This Aurora bathroom remodel had one requirement above all else: speed, without cutting corners. Our team completed the full renovation in 7 working days, including a ceiling reframe that opened up a previously cramped, low-ceilinged room. Here's how the project came together, step by step.
1. Project Overview
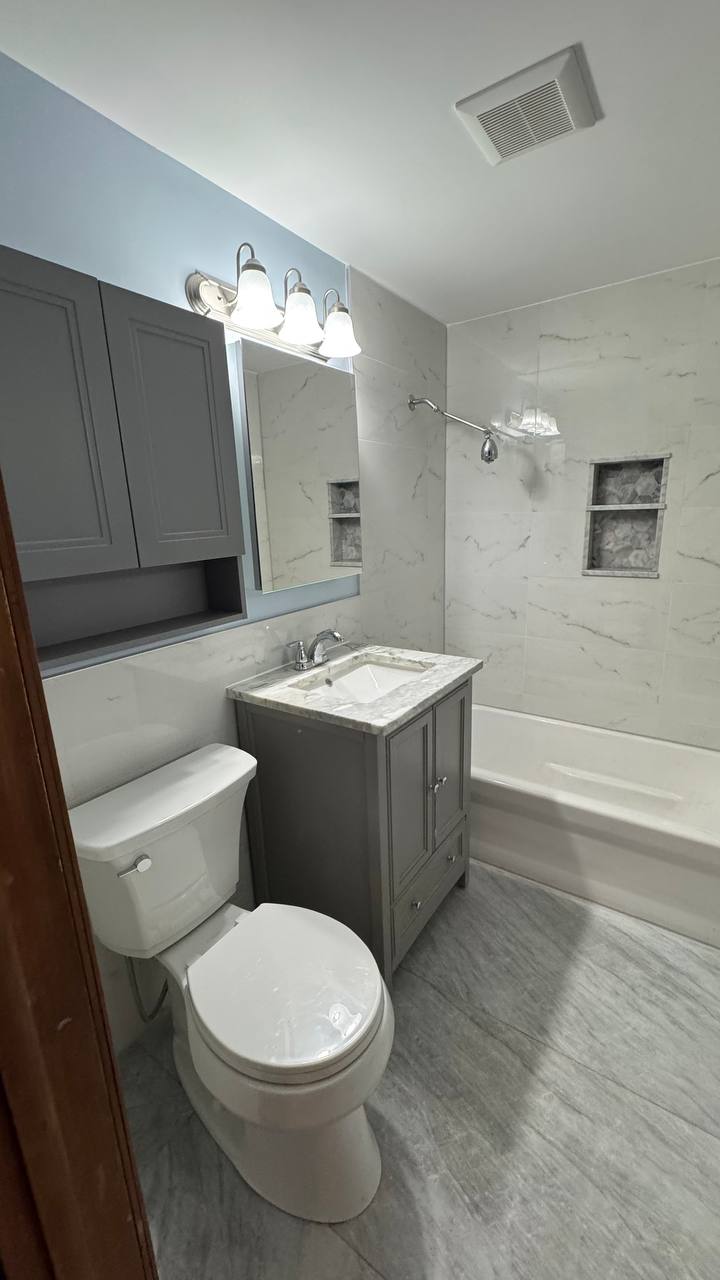
This Aurora, IL bathroom remodeling project was a complete renovation designed to create a cleaner, more functional, and modern space for everyday use.
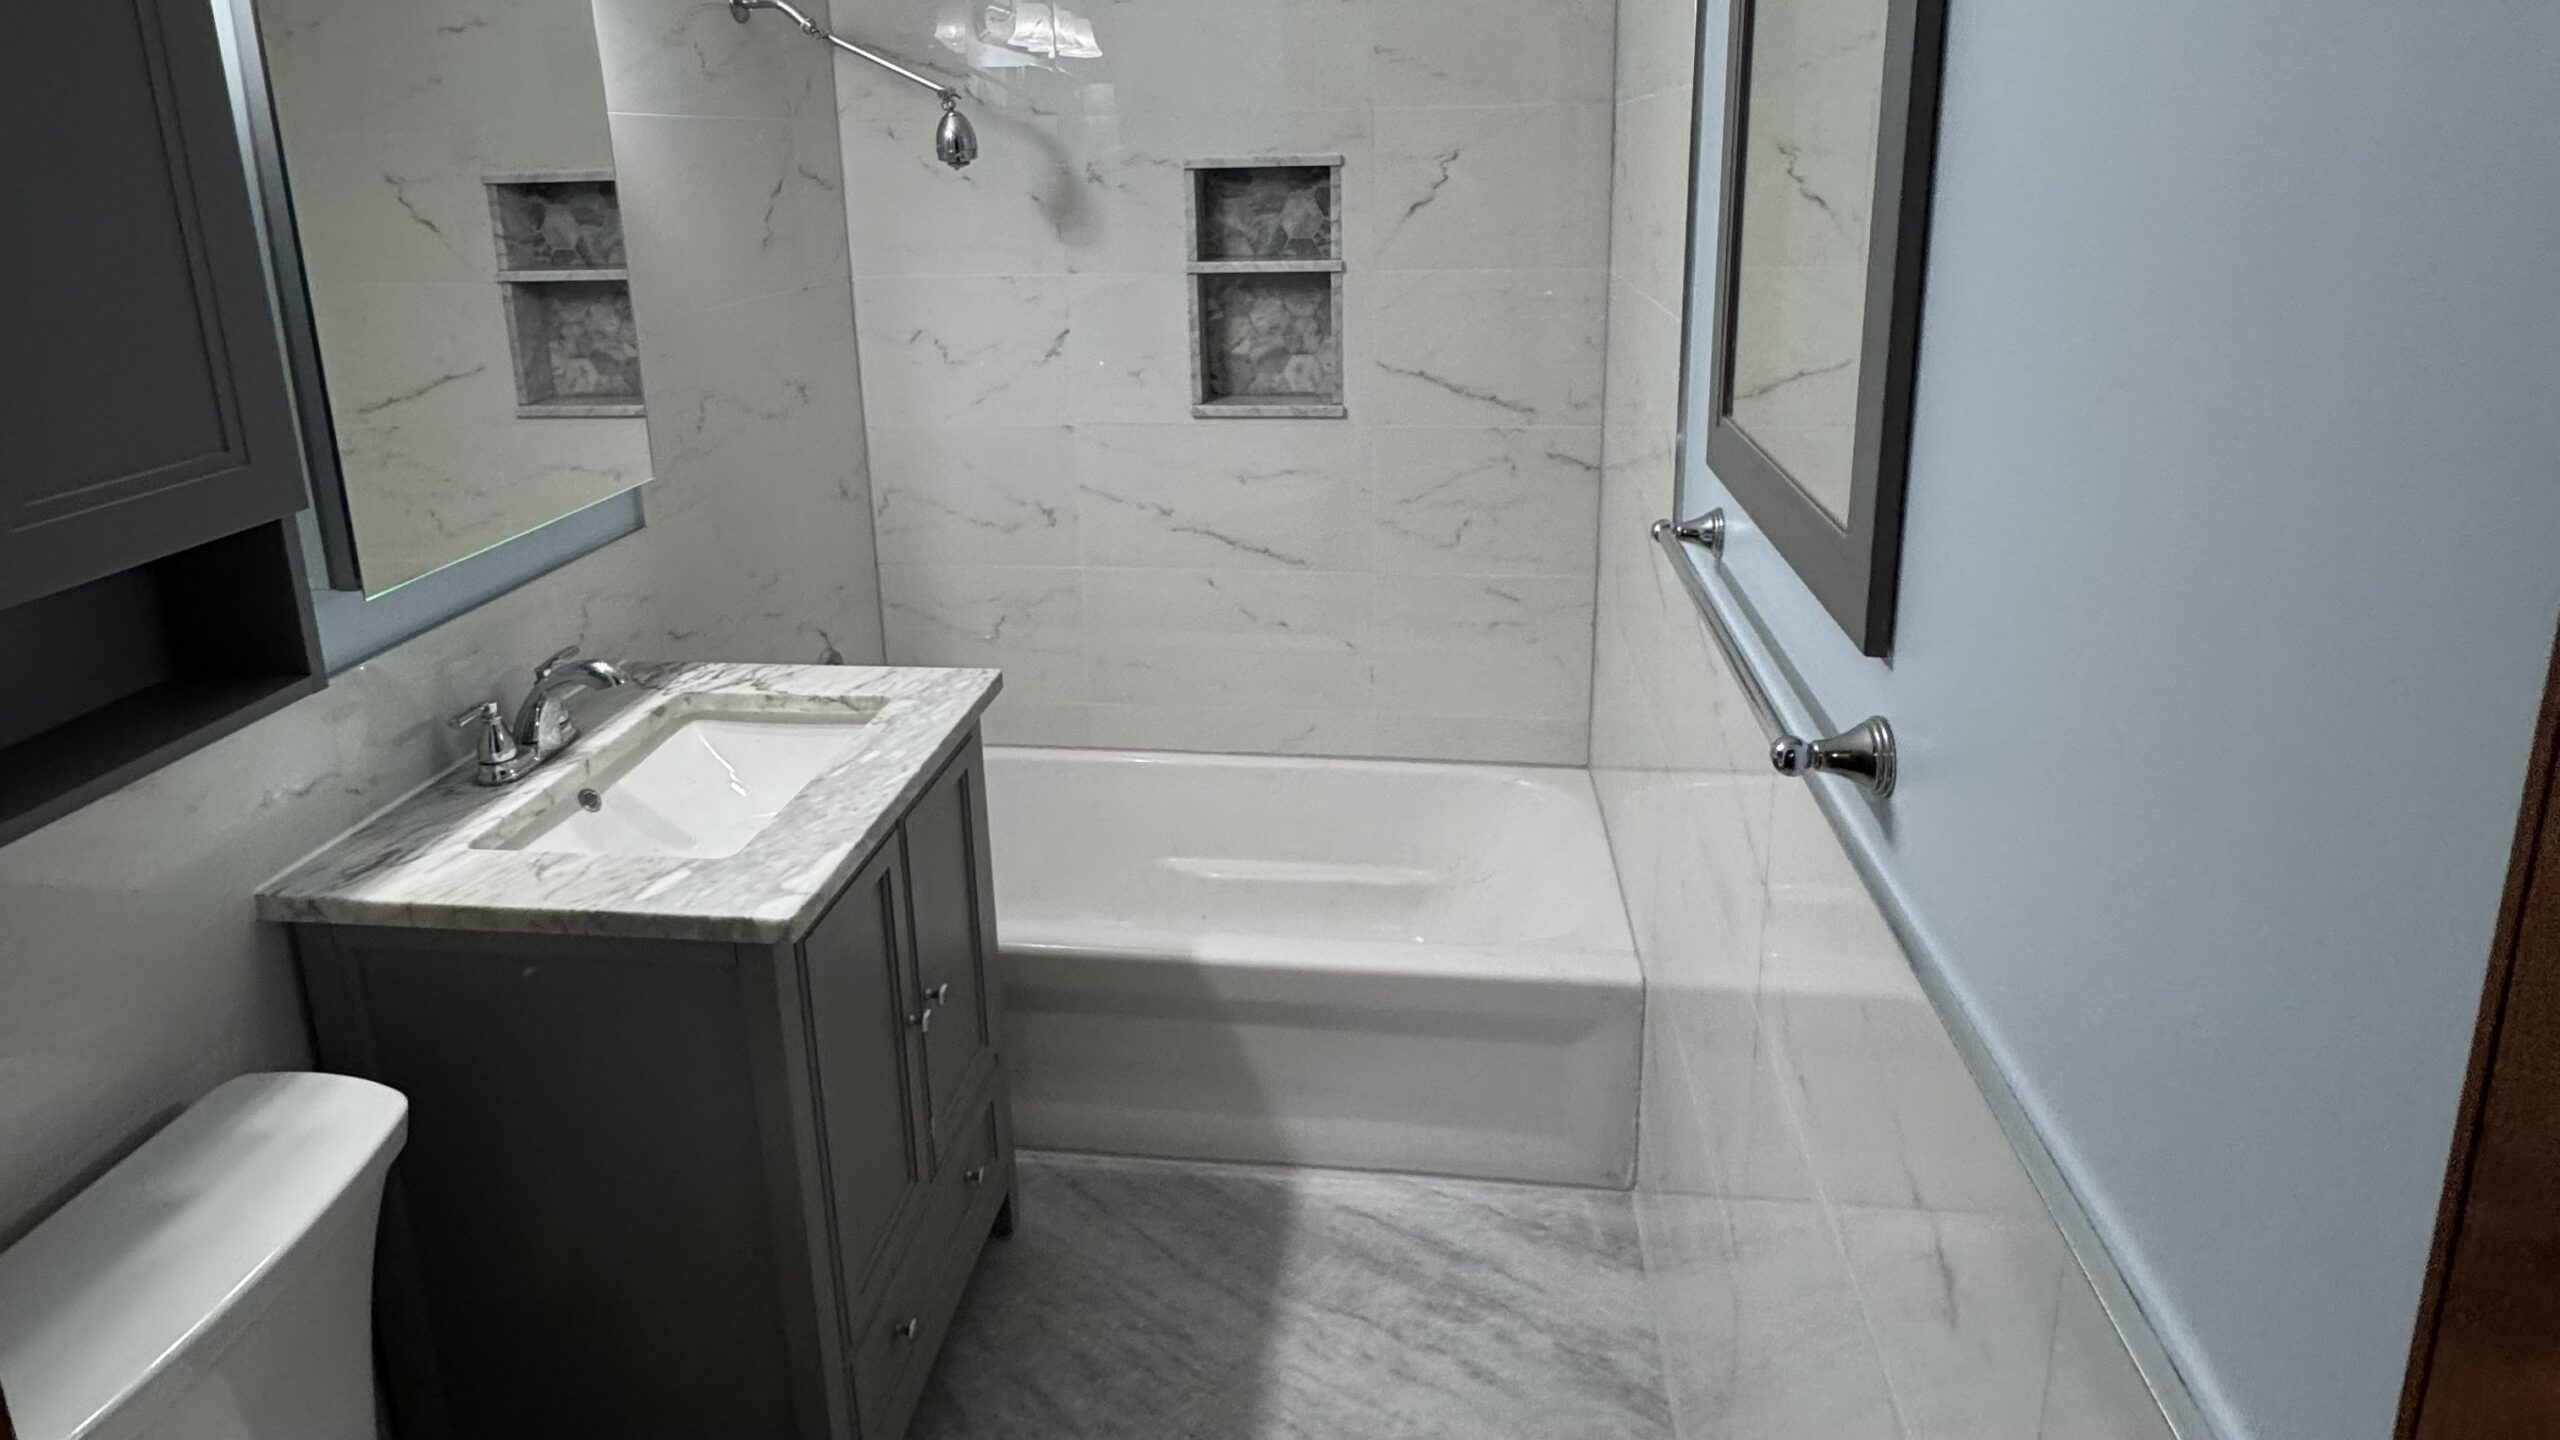
The project included new floor and wall tile, a new vanity, toilet, exhaust fan, lighting, fresh paint, and updated electrical fixtures.
A custom shower niche was also built using mosaic tile and an engineered stone shelf, combining practical storage with a clean, finished appearance.
The renovation was completed in just 7 days, with careful coordination of the work from demolition and preparation through tile installation and final finishing.
2. The Bathroom Before the Remodel
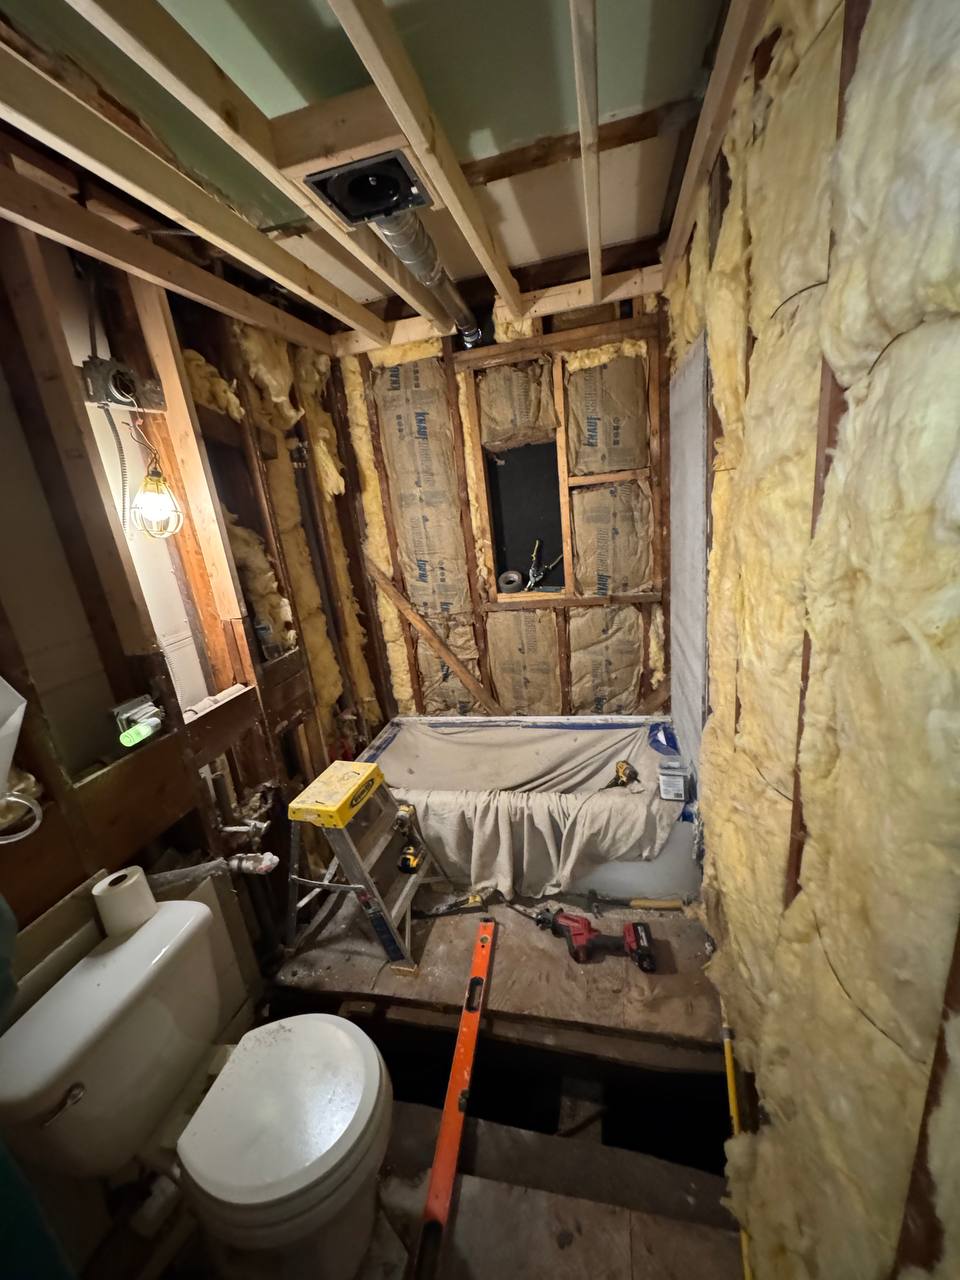
The existing bathroom required a complete update. The project involved removing the existing toilet, floor tile, and wall tile around the bathtub and on portions of the surrounding walls.
The existing lowered ceiling above the bathtub and vanity area was also removed as part of the renovation.
After opening the existing finishes, the bathroom required additional preparation, including replacement of damaged subfloor and installation of new cement board to create a proper base for the new tile.
3. Demolition and Structural Preparation
The first stage of the renovation was demolition and preparation of the existing space.
We removed the old toilet and existing floor tile, as well as the wall tile around the bathtub extending to the ceiling and the tile installed halfway up two additional walls.
During preparation, damaged areas of the subfloor were cut out and replaced.
The existing air vent under the floor was also relocated to the opposite wall with a short duct run to improve the layout of the finished bathroom.
The lowered ceiling above the bathtub and vanity area was removed. New framing was constructed, followed by new drywall installation and joint compound finishing to create a clean, updated ceiling profile.
4. New Cement Board and Tile Installation
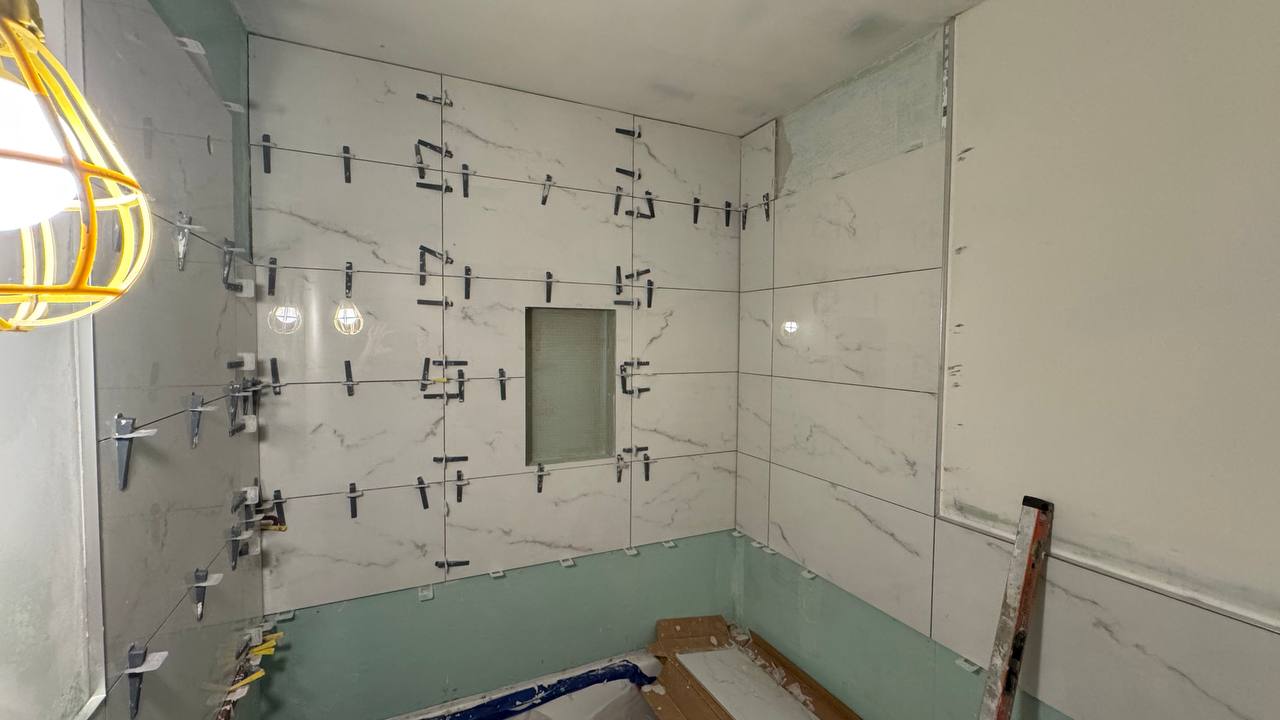
After the demolition and structural preparation were completed, new cement board was installed on the floor and walls in preparation for the tile installation.
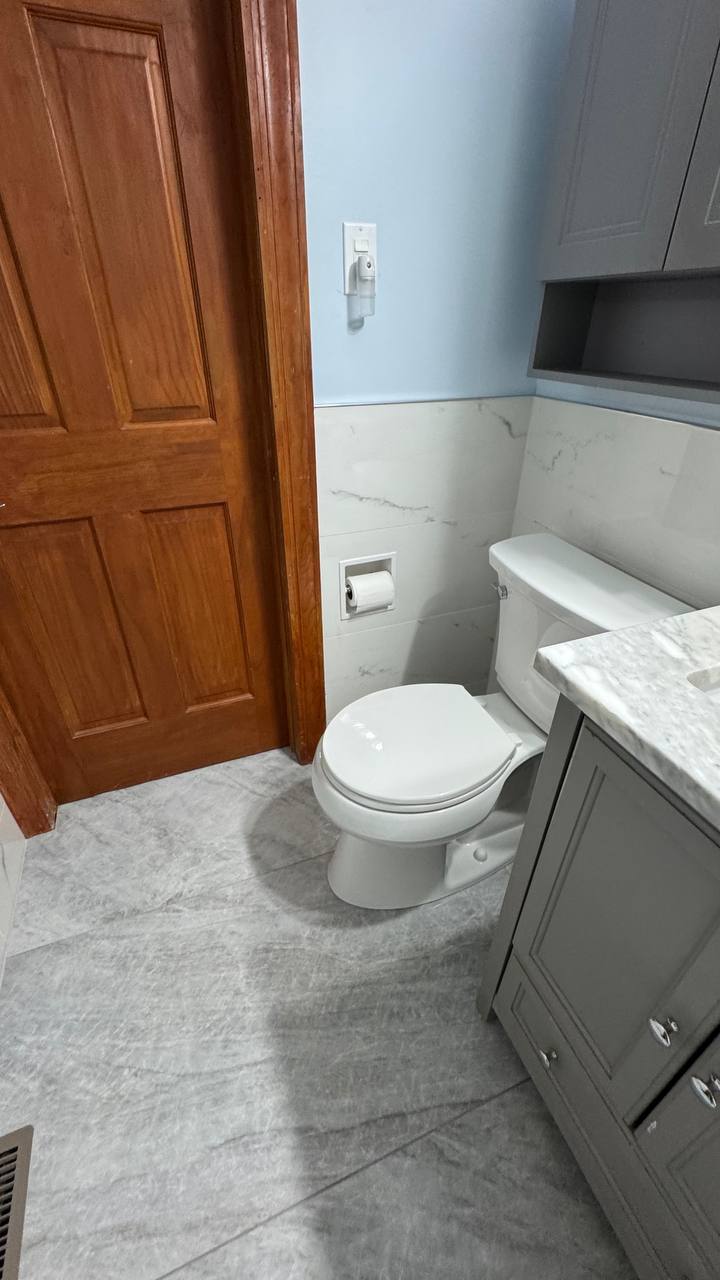
New floor tile was installed throughout the bathroom.
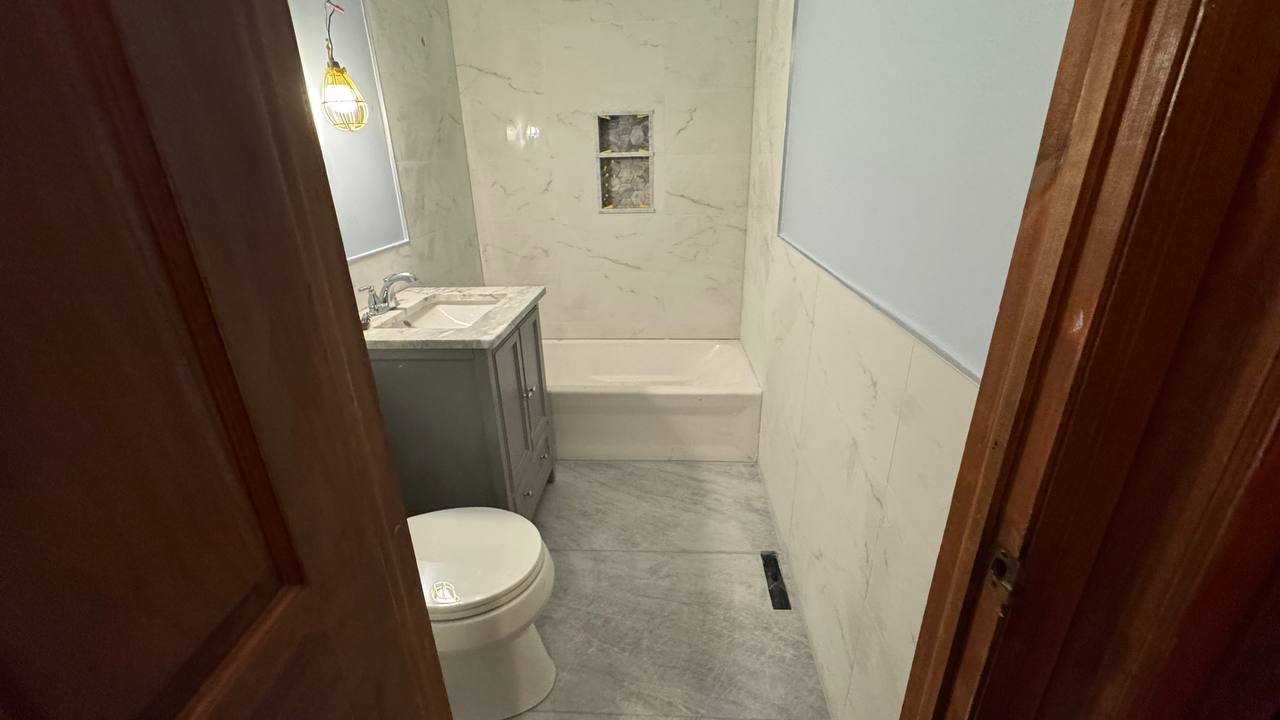
Around the bathtub, new wall tile was installed all the way to the ceiling. On two additional walls, tile was installed approximately halfway up the wall.
The new tile completely changed the appearance of the space and created a cleaner, more contemporary finish.
Metal decorative corner trims were installed on exposed tile edges to provide a finished transition and protect the exposed corners.
5. Custom Shower Niche with Mosaic Tile
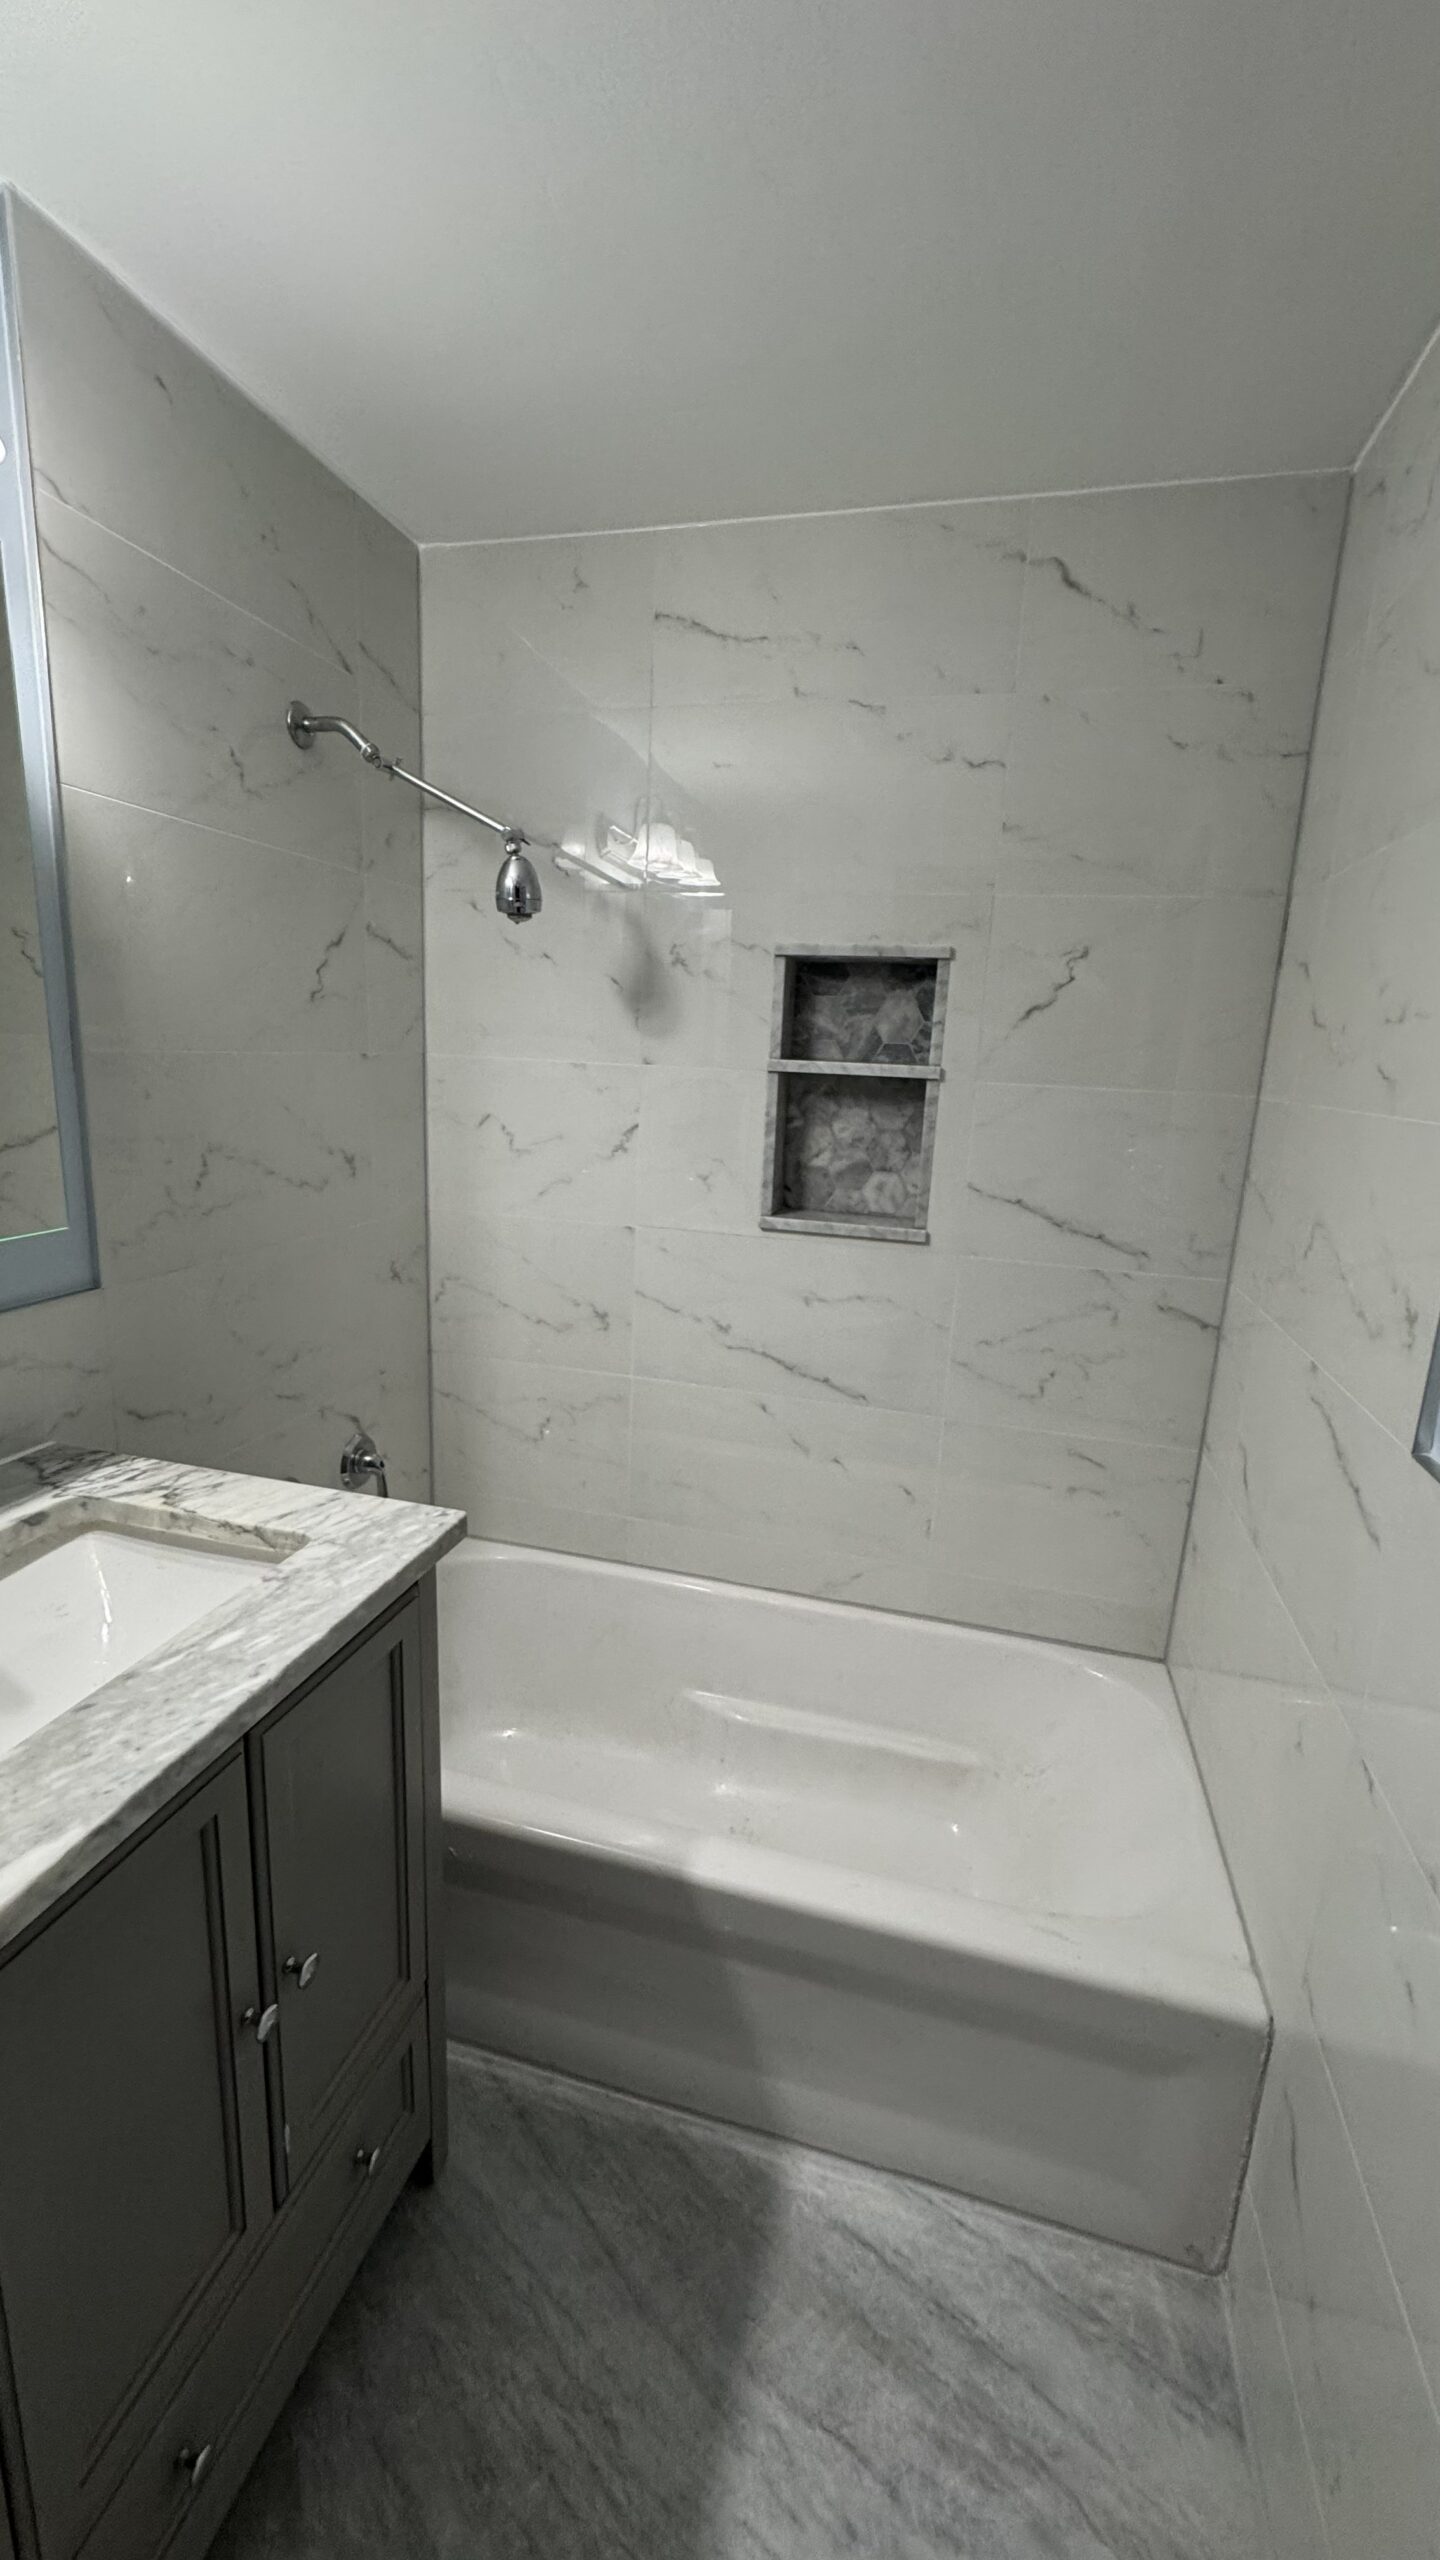
A custom recessed shower niche was built into the bathtub surround to provide convenient storage while adding a distinctive design element.
The niche was finished with mosaic tile and an engineered stone shelf designed for durability and easy maintenance.
The combination of the mosaic tile and engineered stone shelf creates a clean contrast with the surrounding wall tile while providing a practical storage area for everyday bathroom essentials.
Careful attention was given to the edges and transitions of the niche to create a clean finished appearance.
6. New Vanity, Toilet and Plumbing
The existing bathroom fixtures were updated with a new vanity cabinet and sink.
The vanity was installed and connected to the existing plumbing to provide a fresh and functional focal point for the bathroom.
We also installed a new toilet and completed the necessary plumbing connections.
The new fixtures were selected and installed as part of the overall renovation so the vanity, tile, flooring, and other finishes work together as one cohesive design.
7. Updated Lighting, Electrical and Exhaust Fan
The bathroom also received several electrical and ventilation updates.
We installed a new exhaust fan in the center of the ceiling to improve bathroom ventilation.
A new light fixture was installed above the vanity, and the existing switch and GFCI outlet were replaced.
These updates improved the functionality of the bathroom while complementing the new vanity, mirror, tile, and other finishes.
8. Painting and Final Finishing
After the major installation work was completed, the walls and ceiling were painted with two coats to create a clean and consistent finish.
The final stage also included grouting the new tile and applying silicone along the bathtub edges.
These finishing steps helped protect moisture-sensitive transitions and created clean lines between the tile and bathtub.
The exposed tile edges were finished with metal decorative trims, providing both a finished appearance and additional protection for the corners.
Completed in 7 Days
This complete bathroom renovation was finished in just 7 days.
The project required coordination of demolition, subfloor repair, ceiling framing and drywall work, cement board installation, tile installation, plumbing, electrical and ventilation updates, painting, grouting, silicone, and final fixture installation.
Completing this scope of work within seven days required careful scheduling and an efficient sequence of construction activities.
Our goal was to keep the project moving while maintaining the quality of the installation and paying attention to the finishing details.
9. The Final Result
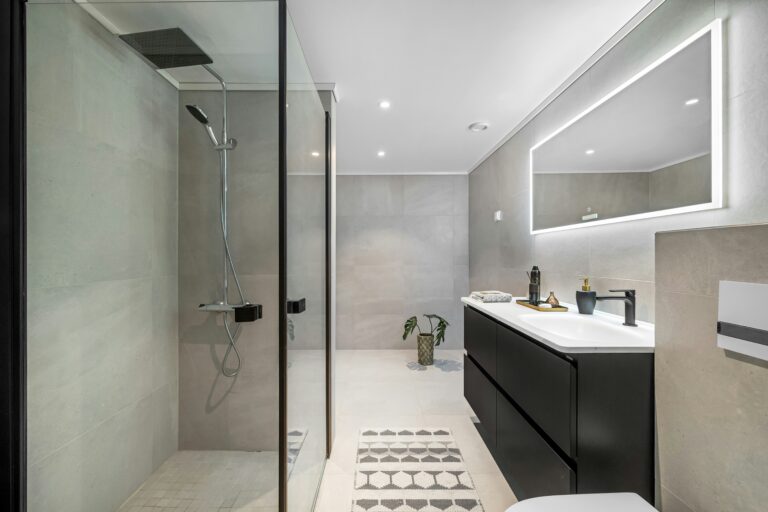
The finished bathroom combines updated functionality with a clean, modern appearance.
The new floor and wall tile create a fresh foundation for the space, while the custom shower niche adds practical storage and a distinctive design detail.
The new vanity, sink, toilet, exhaust fan, lighting, electrical fixtures, and fresh paint complete the renovation.
The engineered stone shelf in the shower niche provides a durable surface designed for everyday use, while the decorative metal tile trims and carefully finished silicone joints add clean, professional finishing details.
The result is a functional bathroom designed for everyday comfort and long-term use.
10. Bathroom Remodeling in Aurora and Nearby Areas
Euro Pros provides bathroom remodeling and home improvement services in Aurora, Naperville, and surrounding Chicago suburbs.
Our bathroom remodeling services can include demolition and preparation, tile installation, vanities, plumbing fixtures, electrical and lighting updates, ventilation, painting, and detailed finish work.
Whether you are planning a complete bathroom renovation or updating specific areas of an existing bathroom, Euro Pros can coordinate the work from preparation through completion.
Planning a bathroom remodel? Contact Euro Pros to discuss your project and request an estimate.